Autopilot while being operationally nodeless, still creates nodes for your workloads behind the scenes. Sometimes it may be desirable as an operator to separate your workloads so that certain workloads are scheduled on their separates nodes, a technique known as workload separation. One example I heard recently was a cluster that primarily processes large batch jobs. In addition to these spikey workloads that cause a lot of scale-up and scale-downs (something that Autopilot takes care of for you), there are a few “stable” workloads that need to run consistently and are better to have placed by themselves.
To achieve this in a traditional Kubernetes cluster, you would label and taint a group of nodes, then tolerate the taint, and select the label in your Podspec. For Autopilot, you can do just the latter: tolerate the taint, and select the label in the Podspec, and Autopilot will automatically create nodes with the required taint and label. This is the same method as with Node Auto Provisioning for GKE Standard.
Add the following to your Podspec. Change the key/value pair for each group of pods you want to be separate (e.g. group=”1″, group=”2″ and so on).
      tolerations:
      - key: group
        operator: Equal
        value: "1"
        effect: NoSchedule
      nodeSelector:
        group: "1"
Here’s a fully worked example, we will create 2 deployments and keep them separate:
apiVersion: apps/v1
kind: Deployment
metadata:
  name: timeserver1
spec:
  replicas: 10
  selector:
    matchLabels:
      pod: timeserver1-pod
  template:
    metadata:
      labels:
        pod: timeserver1-pod
    spec:
      tolerations:
      - key: group
        operator: Equal
        value: "1"
        effect: NoSchedule
      nodeSelector:
        group: "1"
      containers:
      - name: timeserver-container
        image: docker.io/wdenniss/timeserver:1
apiVersion: apps/v1
kind: Deployment
metadata:
  name: timeserver2
spec:
  replicas: 10
  selector:
    matchLabels:
      pod: timeserver2-pod
  template:
    metadata:
      labels:
        pod: timeserver2-pod
    spec:
      tolerations:
      - key: group
        operator: Equal
        value: "2"
        effect: NoSchedule
      nodeSelector:
        group: "2"
      containers:
      - name: timeserver-container
        image: docker.io/wdenniss/timeserver:1
Create these 2 deployments, and inspect the results:
kubectl create -f https://raw.githubusercontent.com/WilliamDenniss/autopilot-examples/master/workload-separation/separation1.yaml
kubectl create -f https://raw.githubusercontent.com/WilliamDenniss/autopilot-examples/master/workload-separation/separation2.yaml
sleep 90
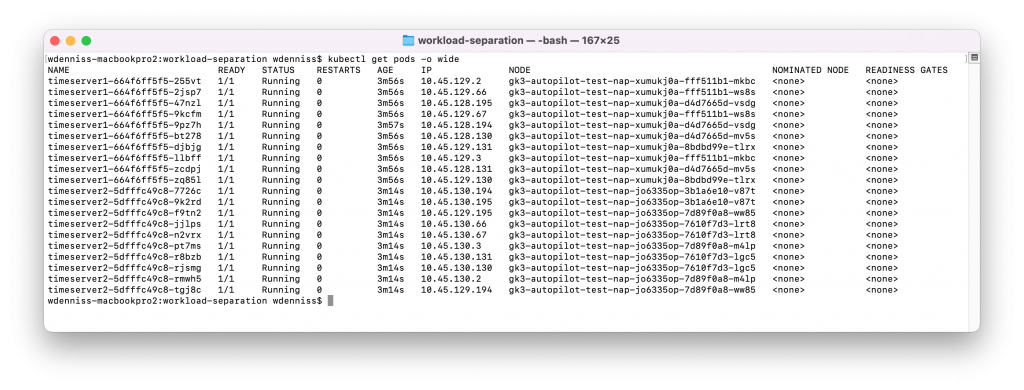
Wait for the nodes to be provisioned (watch -d kubectl get pods) then, look at which nodes each pod has landed on:
kubectl get pods -o wide

2 comments
Comments are closed.