Last week, GKE announced GPU support for Autopilot. Here’s a fun way to try it out: a TensorFlow-enabled Jupyter Notebook with GPU-acceleration! We can even add state, so you can save your work between sessions. Autopilot makes all this really, really easy, as you can configure everything as a Kubernetes object.
Update: this post is now on the Google Cloud blog.
Setup
First, create a GKE Autopilot cluster running 1.24 (1.24.2-gke.1800+ to be exact). Be sure you’re in one of the regions with GPUs (the pricing table helpfully shows which region.
To create:
CLUSTER_NAME=test-cluster
REGION=us-west1
gcloud container clusters create-auto $CLUSTER_NAME \
    --release-channel "rapid" --region $REGION \
    --cluster-version "1.24"
Or update an existing:
CLUSTER_NAME=test-cluster
REGION=us-west1
gcloud container clusters upgrade $CLUSTER_NAME \
    --region $REGION \
    --master --cluster-version "1.24"
Installation
Now we can deploy a Tensorflow-enabled Jupyter Notebook with GPU-acceleration.
The following StatefulSet definition creates an instance of the tensorflow/tensorflow:latest-gpu-jupyter container that gives us a Jupyter notebook in a TensorFlow environment. It provisions a NVIDIA A100 GPU, and mounts a PersistentVolume to the /tf/saved path so you can save your work and it will persist between restarts. And it runs in Spot, so you save 60-91% (and remember, our work is saved if it’s preempted). This is a legit Jupyter Notebook that you can use long term!
# Tensorflow/Jupyter StatefulSet
apiVersion: apps/v1
kind: StatefulSet
metadata:
  name: tensorflow
spec:
  selector:
    matchLabels:
      pod: tensorflow-pod
  serviceName: tensorflow
  replicas: 1
  template:
    metadata:
      labels:
        pod: tensorflow-pod
    spec:
      nodeSelector:
        cloud.google.com/gke-accelerator: nvidia-tesla-a100
        cloud.google.com/gke-spot: "true"
      terminationGracePeriodSeconds: 30
      containers:
      - name: tensorflow-container
        image: tensorflow/tensorflow:latest-gpu-jupyter
        volumeMounts:
        - name: tensorflow-pvc
          mountPath: /tf/saved
        resources:
            requests:
              nvidia.com/gpu: "1"
              ephemeral-storage: 10Gi
## Optional: override and set your own token
#        env:
#          - name: JUPYTER_TOKEN
#            value: "jupyter"
  volumeClaimTemplates:
  - metadata:
      name: tensorflow-pvc
    spec:
      accessModes:
        - ReadWriteOnce
      resources:
        requests:
          storage: 100Gi
---
# Headless service for the above StatefulSet
apiVersion: v1
kind: Service
metadata:
  name: tensorflow
spec:
  ports:
  - port: 8888
  clusterIP: None
  selector:
    pod: tensorflow-pod
We also need a load balancer, so we can connect to this notebook from our desktop:
# External service
apiVersion: "v1"
kind: "Service"
metadata:
  name: tensorflow-jupyter
spec:
  ports:
  - protocol: "TCP"
    port: 80
    targetPort: 8888
  selector:
    pod: tensorflow-pod
  type: LoadBalancer
Deploy them both like so:
kubectl create -f https://raw.githubusercontent.com/WilliamDenniss/autopilot-examples/master/tensorflow/tensorflow.yaml
kubectl create -f https://raw.githubusercontent.com/WilliamDenniss/autopilot-examples/master/tensorflow/tensorflow-jupyter.yaml
While we’re waiting, we can watch the events in the cluster to make sure it’s going to work, like so (output truncated to show relevant events):
$ kubectl get events -w
LAST SEEN   TYPE      REASON                         OBJECT                                              MESSAGE
5m25s       Warning   FailedScheduling               pod/tensorflow-0                                    0/3 nodes are available: 2 Insufficient cpu, 2 Insufficient memory, 2 Insufficient nvidia.com/gpu, 3 node(s) didn't match Pod's node affinity/selector. preemption: 0/3 nodes are available: 3 Preemption is not helpful for scheduling.
4m24s       Normal    TriggeredScaleUp               pod/tensorflow-0                                    pod triggered scale-up: [{https://www.googleapis.com/compute/v1/projects/gke-autopilot-test/zones/us-west1-b/instanceGroups/gk3-test-cluster-nap-1ax02924-9c722205-grp 0->1 (max: 1000)}]
2m13s       Normal    Scheduled                      pod/tensorflow-0                                    Successfully assigned default/tensorflow-0 to gk3-test-cluster-nap-1ax02924-9c722205-lzgj
The way Kubernetes and Autopilot works is you’ll initially see FailedScheduling, that’s because at the moment you deploy the code, there is no resource that can handle your Pod. But then you’ll see TriggeredScaleUp, which is Autopilot adding that resource for you, and finally Scheduled once the Pod has the resources. GPU nodes take a little longer than regular CPU nodes to provision, and this container takes a little while to boot. In my case it took about 5min all up from scheduling the Pod to it being running.
Using the Notebook
Now it’s time to connect. First, get the external IP of the load balancer
$ kubectl get svc
NAME                 TYPE           CLUSTER-IP     EXTERNAL-IP    PORT(S)        AGE
kubernetes           ClusterIP      10.102.0.1     <none>         443/TCP        20d
tensorflow           ClusterIP      None           <none>         80/TCP         9m4s
tensorflow-jupyter   LoadBalancer   10.102.2.107   34.127.75.81   80:31790/TCP   8m35s
And browse to it
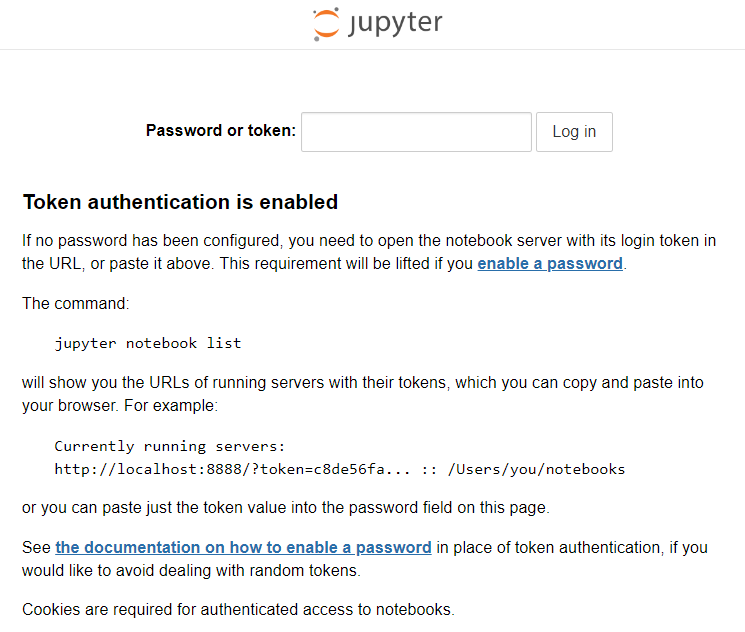
We can run the command it suggests in Kubernetes with exec:
$ kubectl exec -it sts/tensorflow -- jupyter notebook list
Currently running servers:
http://0.0.0.0:8888/?token=e54a0e8129ca3918db604f5c79e8a9712aa08570e62d2715 :: /tf
Login by copying the token (in my case, e54a0e8129ca3918db604f5c79e8a9712aa08570e62d2715) into the input box and hit “Log In”.
Note: if you want to skip this step, you can set your own token in the configuration, just uncomment the env lines and define your own token.
There are 2 folders, one with some included samples and “saved” which is the one we mounted from a persistent disk. I recommend operating out of the “saved” folder to preserve your state between sessions, and moving the included “tensorflow-tutorials” directory into the “saved” directory before getting started. You can use the UI below to move the folder, and upload your own notebooks.

Let’s try run a few of the included samples.
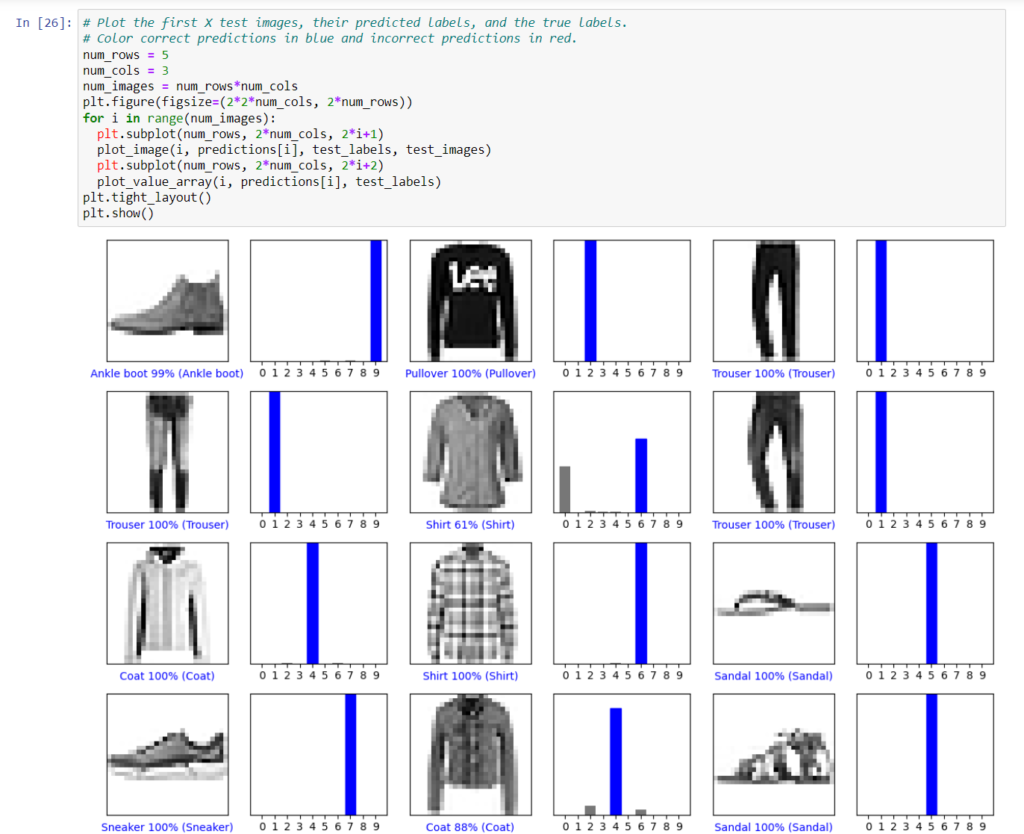
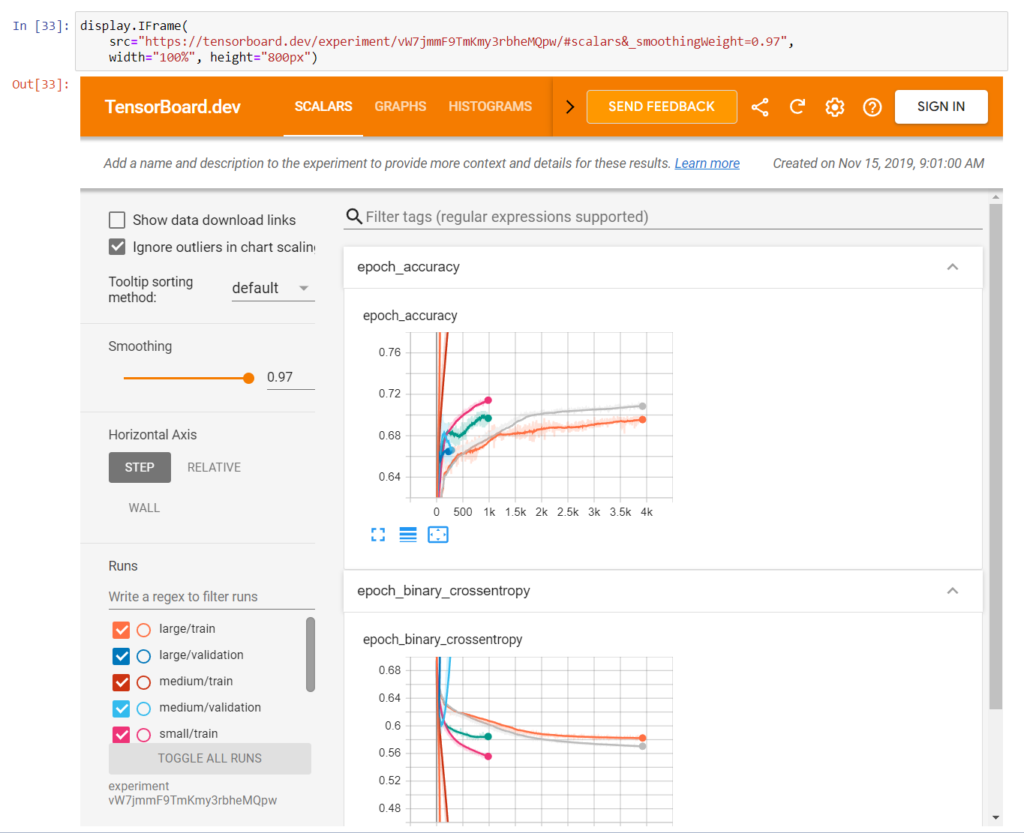
We can upload our own projects, like the examples in the Tensorflow docs. Just download the notebook from the docs, and upload it jupyter to the saved/ folder, and run.
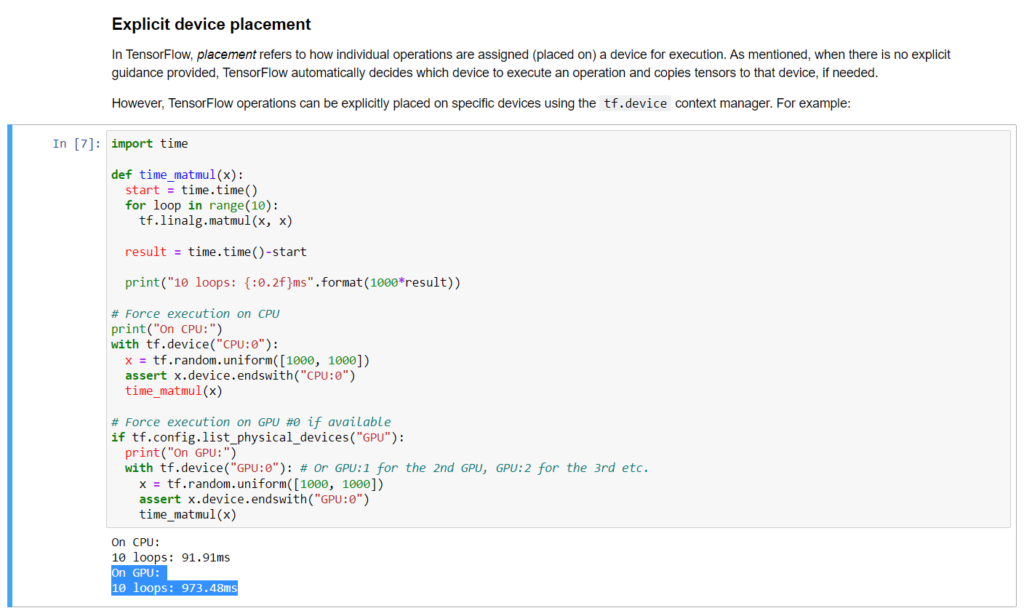
So there it is. We have a reusable TensorFlow Jupyter notebook running on an NVIDIA A100! This isn’t just a toy either, we hooked up a PersistentVolume so your work is saved (even if the StatefulSet is deleted, or the Pod disrupted). We’re using Spot compute to save some cash. And the entire thing was provisioned from 2 YAML files, no need to think about the underlying compute hardware. Neat!
Monitoring & Troubleshooting
If you get a message like “The kernel appears to have died. It will restart automatically.”, then the first step is to tail your logs.
kubectl logs tensorflow-0 -f
A common issue I saw was when trying to run two notebooks, I would exhaust my GPU’s memory (CUDA_ERROR_OUT_OF_MEMORY in the logs). The easy fix is to shutdown all but the notebook you are actively using.
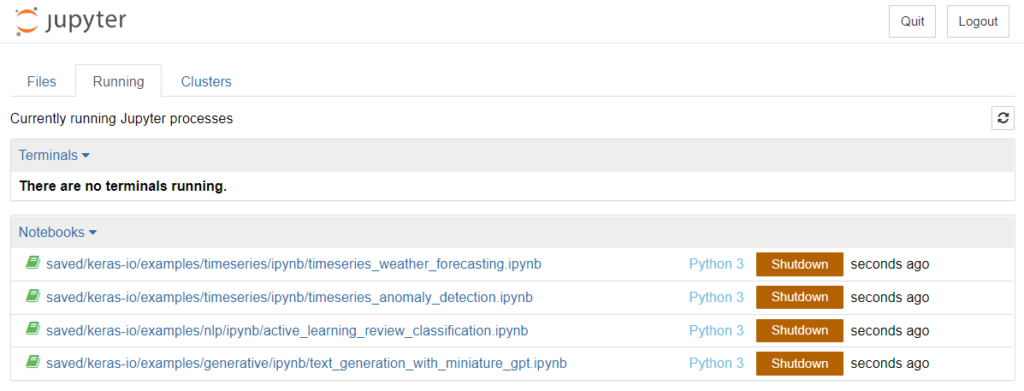
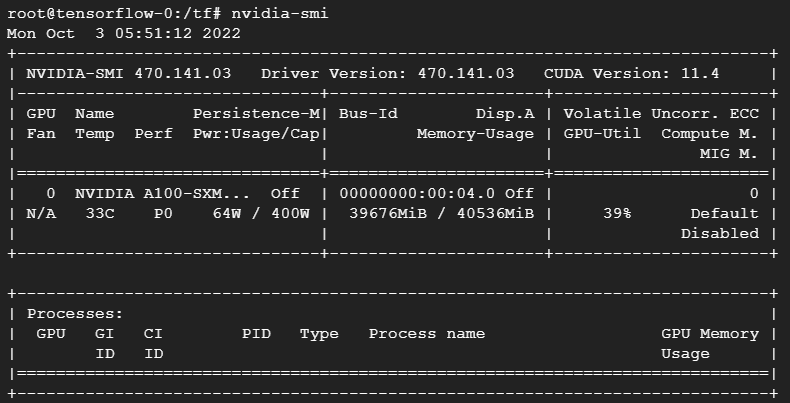
You can keep an eye on the GPU utilization like so:
$ kubectl exec -it sts/tensorflow -- bash
# watch -d nvidia-smi
If you need to restart the setup for whatever reason, just delete the pod and Kubernetes will recreate it. This is very fast on Autopilot, as the GPU-enabled node resource will hang around for a short time in the cluster.
kubectl delete pod tensorflow-0
What’s Next
To shell into the environment and run arbitrary code (i.e. without using the notebook UI), you can use the following. Just be sure to save any data you want to persist in /tf/saved/.
kubectl exec -it sts/tensorflow -- bash
If you want some more tutorials, check out the TensorFlow tutorials and Keras.
I cloned the Keras repo onto my persistent volume to have all those tutorials in my notebook as well.
$ kubectl exec -it sts/tensorflow -- bash
# cd /tf/saved
# git clone https://github.com/keras-team/keras-io.git
# pip install pandas
If you need any additional Python modules for your notebooks like Pandas, you can set that up the same way. To create a more durable setup though you’ll want your own Dockerfile extending the one we used above (let me know if you want to share such a recipie in a follow up post).
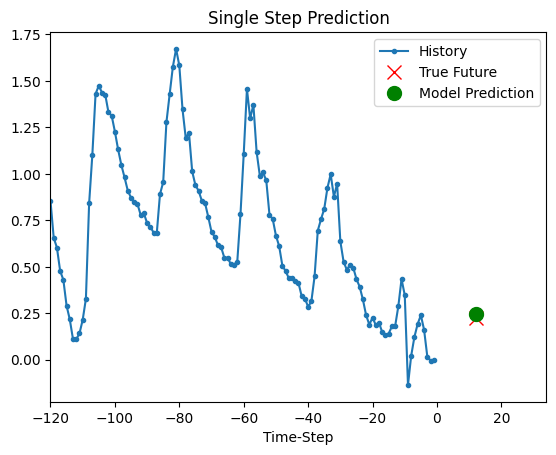
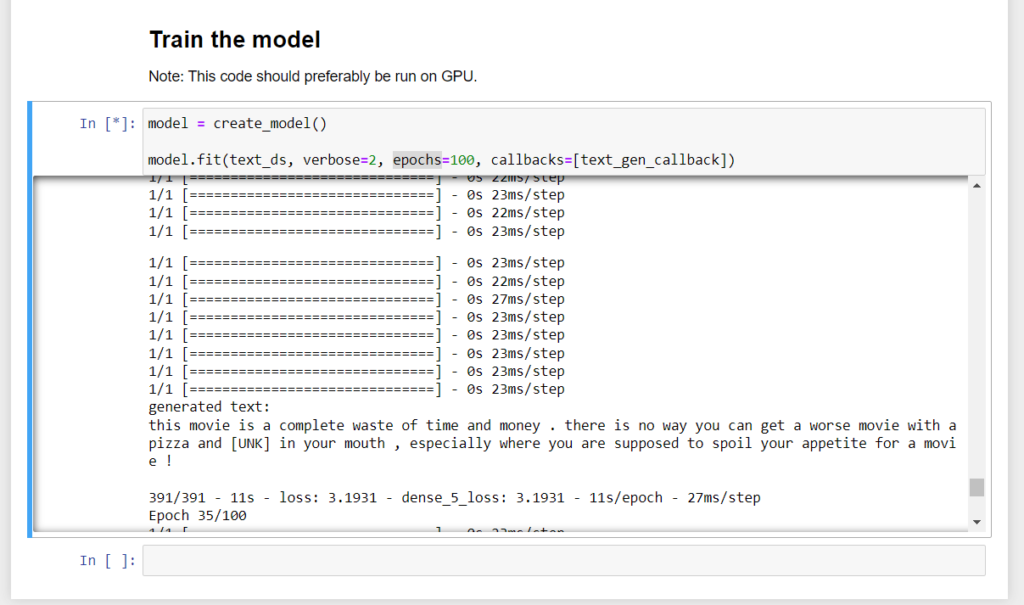
I ran a few different examples, here’s some of the output:
Cleanup
When you’re done clean up by removing the StatefulSet and services:
kubectl delete sts tensorflow
kubectl delete svc tensorflow tensorflow-jupyter
Again, the nice thing about Autopilot is that deleting the Kubernetes resources (in this case a StatefulSet and LoadBalancer) will end the associated charges.
That just leaves the persistent disk. You can either keep it around (so that if you re-create the above StatefulSet, it will be re-attached and your work will be saved), or if you no longer need it, then go ahead and delete the disk as well.
kubectl delete persistentvolumeclaim/tensorflow-pvc-tensorflow-0
You can delete the cluster if you don’t need it anymore, as that does have it’s own charge (though the first GKE cluster is free).
gcloud container clusters delete $CLUSTER_NAME --region $REGION
Can’t wait to see what you do with this. If you want, tweet your creation at @WilliamDenniss.