When building your business using LLMs as a key component, you may wish to be a master of your own domain and run your own model. Running your own LLM protects you from changes like pricing increases or API availability with third-party services, guarantees the privacy of your data (no data needs to leave your VPC), and lets you experiment with advanced topics like fine-tuning. GKE, and in particular Autopilot mode is a great place to run your own LLM, as it takes care of much of the compute orchestration for you, allowing you to focus your energy on providing the LLM API for your business.
In this post, I take the GKE LLM tutorial and tweak it to run in Autopilot mode. Only one change is needed, which is to mount a generic ephemeral volume for the data volume path, as Autopilot is a Pod-based model.
Firstly, we’ll need a cluster with NVIDIA L4 support. According to the docs, that means using GKE version 1.28.3-gke.1203000 or later. We also need to pick a region with L4 support. Passing “1.28” in the version string is enough to get the latest patch of 1.28 which will suffice here [2024-12 update: passing the version with --cluster-version "1.28" is no longer needed as current versions are newer], and us-west1 has L4s so let’s use that. Putting it together:
CLUSTER_NAME=llm-test
REGION=us-west1
gcloud container clusters create-auto $CLUSTER_NAME \
    --region $REGION
Now, deploy your LLM. We can follow the tutorial but use a slightly modified deployment. Here’s the deployment for Falcon:
apiVersion: apps/v1
kind: Deployment
metadata:
  name: llm
spec:
  replicas: 1
  selector:
    matchLabels:
      app: llm
  template:
    metadata:
      labels:
        app: llm
    spec:
      containers:
      - name: llm
        image: ghcr.io/huggingface/text-generation-inference:1.1.0
        resources:
          limits:
            nvidia.com/gpu: "2"
        env:
        - name: MODEL_ID
          value: tiiuae/falcon-40b-instruct
        - name: NUM_SHARD
          value: "2"
        - name: PORT
          value: "8080"
        - name: QUANTIZE
          value: bitsandbytes-nf4
        volumeMounts:
          - mountPath: /dev/shm
            name: dshm
          - mountPath: /data
            name: data
      volumes:
        - name: dshm
          emptyDir:
              medium: Memory
        - name: data
          ephemeral:
            volumeClaimTemplate:
              metadata:
                labels:
                  type: data-volume
              spec:
                accessModes: [ "ReadWriteOnce" ]
                storageClassName: "premium-rwo"
                resources:
                  requests:
                    storage: 200Gi
      nodeSelector:
        cloud.google.com/gke-accelerator: nvidia-l4
        cloud.google.com/gke-spot: "true"
text-generation-inference.yaml
Note the all important nodeSelector to give us a spot NVIDIA L4 GPU. On Autopilot it’s that easy, just add those 2 lines and GKE will do the rest. Under the hood, Autopilot will match this particular workload with a g2-standard-24 machine with the 2 L4 GPUs requested by this workload.
Clone the repo
git clone https://github.com/WilliamDenniss/autopilot-examples.git
then create the Deployment
cd autopilot-examples/llm/falcon
kubectl apply -f text-generation-inference.yaml
Wait for the Pod to become Ready. It will take a little time, as a few things are happening:
- The node is being provisioned
- GPU drivers are installed
- The container is downloaded (during the “ContainerCreating” phase)
Pro tip: to speed up the ContainerCreating phase, mirror the container into Artifact Registry, then it will only take 10 seconds thanks to GKE image streaming!
watch -d kubectl get pods,nodes
Once the container is running, it will appear similar to:
$ kubectl get pods,nodes
NAME                       READY   STATUS    RESTARTS   AGE
pod/llm-68fd95c699-7mg45   1/1     Running   0          6m32s

NAME                                           STATUS   ROLES    AGE     VERSION
node/gk3-llm-test-nap-1uj8n2g9-7bc7556f-k2lp   Ready    <none>   3m56s   v1.28.3-gke.1203001
node/gk3-llm-test-pool-1-6211caf5-gmjx         Ready    <none>   5m46s   v1.28.3-gke.1203001
node/gk3-llm-test-pool-2-2bb74d90-dbj2         Ready    <none>   2m55s   v1.28.3-gke.1203001
With the container Running, we can watch the logs:
kubectl logs -l app=llm -f
It will take a while for the container to be ready to serve (more than 7 minutes) while the model is prepared. The text you’re looking for in the logs to indicate the model is ready for serving is similar to:
{..."message":"Warming up model","target":"text_generation_router","filename":"router/src/main.rs","line_number":213}
{..."message":"Setting max batch total tokens to 120224","target":"text_generation_router","filename":"router/src/main.rs","line_number":246}
{..."message":"Connected","target":"text_generation_router","filename":"router/src/main.rs","line_number":247
Once the model is ready, you can continue with the rest of the tutorial including adding a service, and a gradio interface, like so:
kubectl apply -f llm-service.yaml
kubectl apply -f gradio.yaml
With the gradio service created, wait for the external IP:
$ kubectl get svc -w
NAME             TYPE           CLUSTER-IP       EXTERNAL-IP   PORT(S)        AGE
gradio-service   LoadBalancer   34.118.239.125   <pending>     80:31805/TCP   0s
kubernetes       ClusterIP      34.118.224.1     <none>        443/TCP        36m
llm-service      ClusterIP      34.118.228.81    <none>        80/TCP         3s
gradio-service   LoadBalancer   34.118.239.125   <pending>     80:31805/TCP   1s
gradio-service   LoadBalancer   34.118.239.125   34.127.67.228   80:31805/TCP   37s
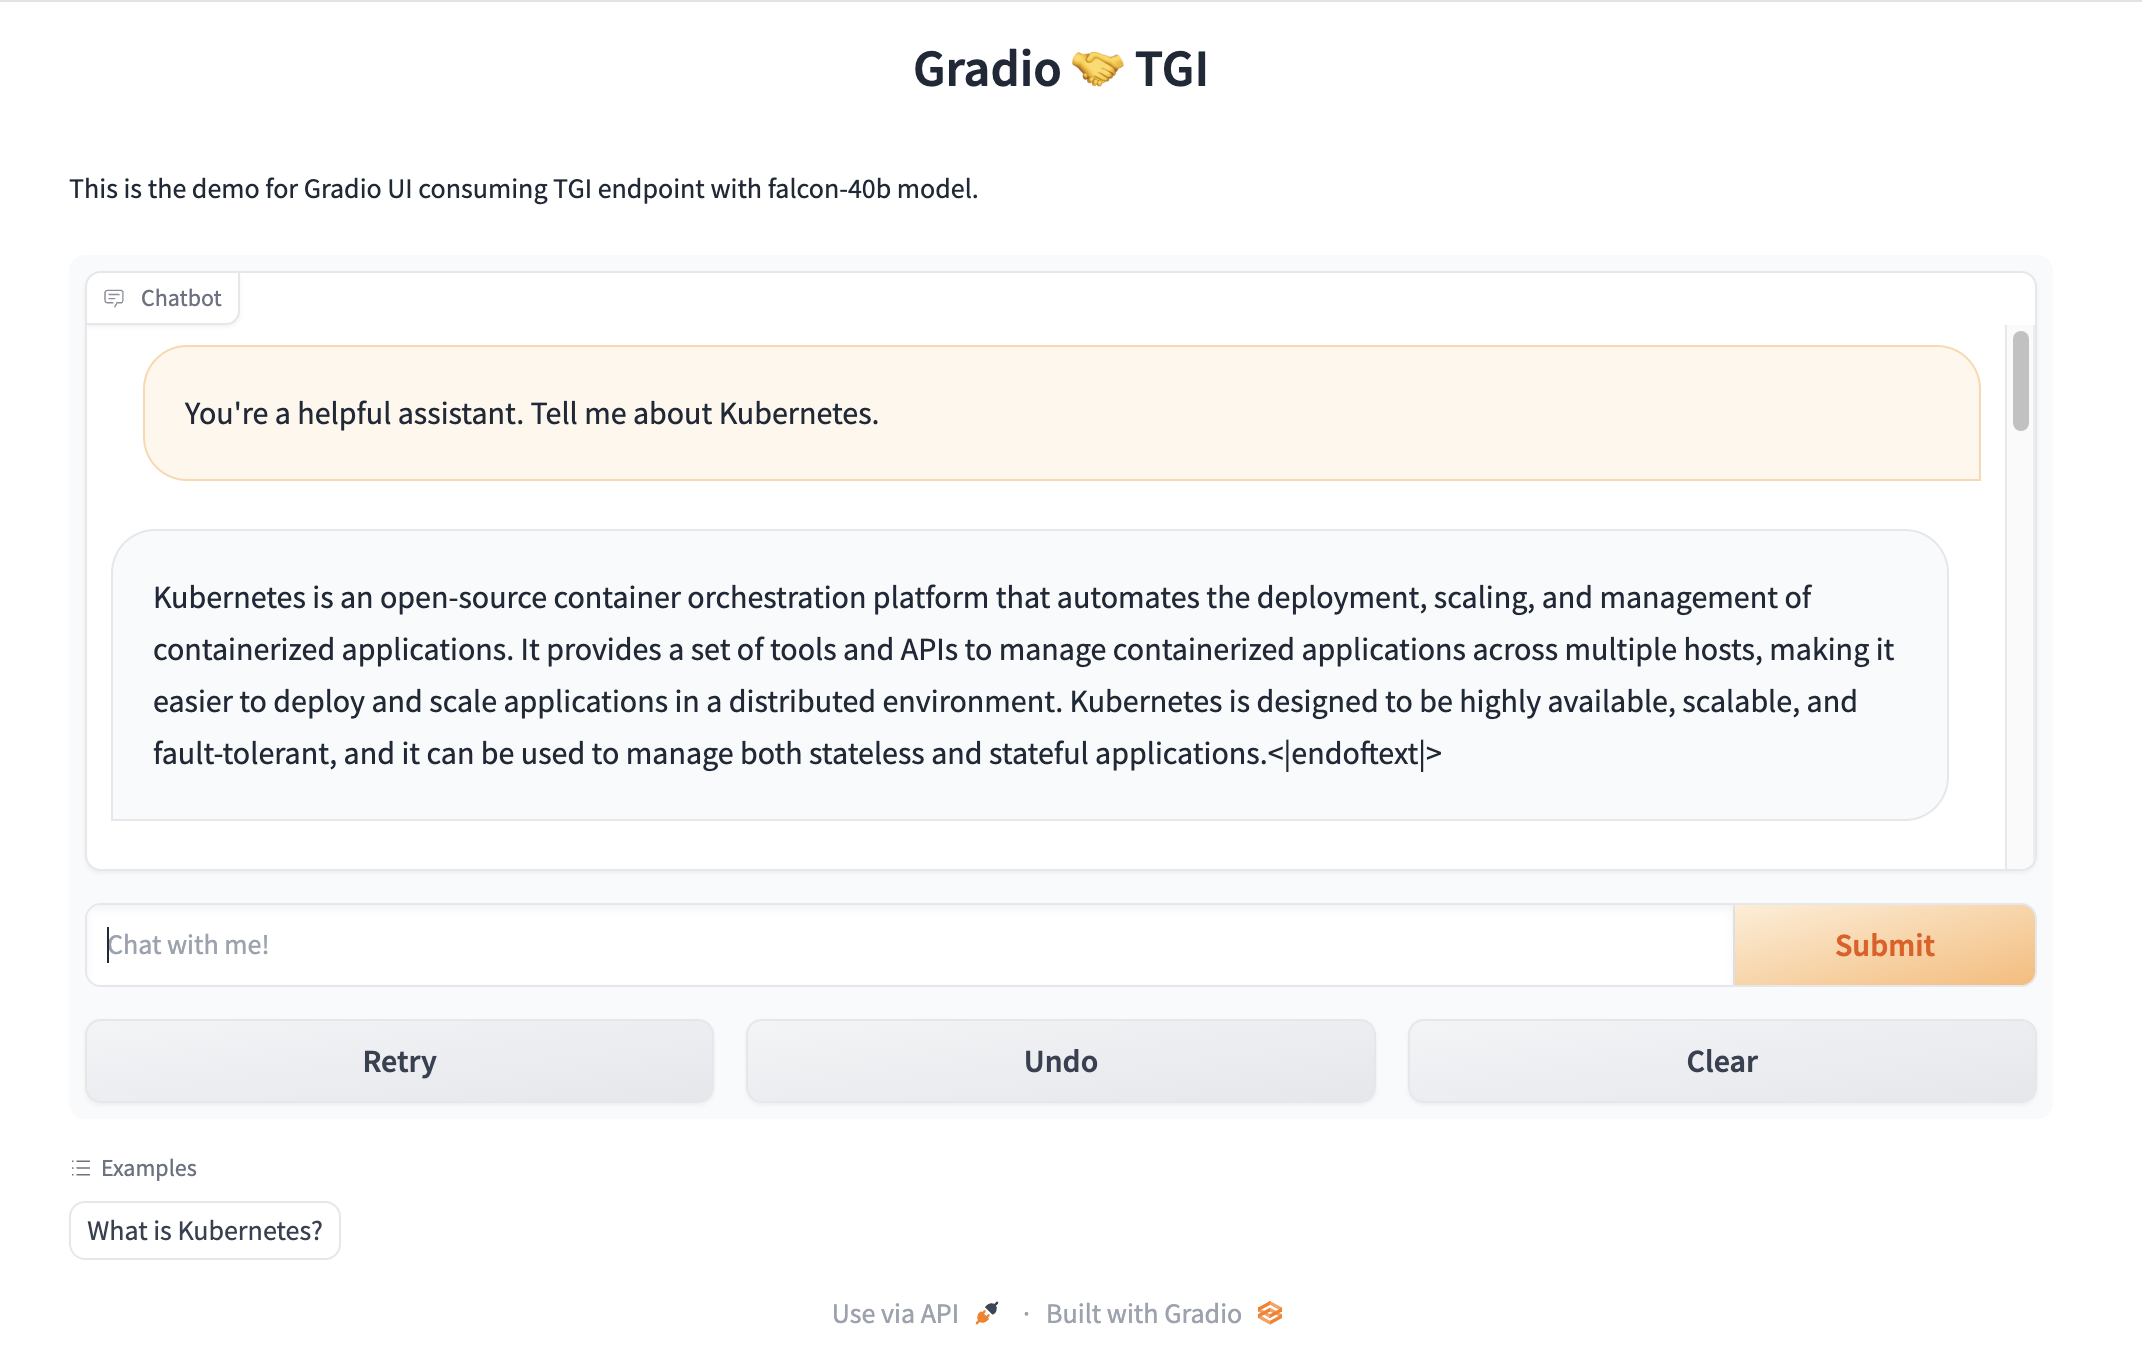
Navigating to the external IP, we can try out some prompts, like “You’re a helpful assistant. Tell me about Kubernetes.”

TIP: if you don’t want to create an external IP, then don’t create the LoadBalancer (remove these lines from the gradio YAML), and instead forward a port on your machine directly to the Deployment for local experimentation without exposing your work to the internet.
kubectl port-forward deploy/gradio 7860:7860
Next steps: to try the LLaMA model, follow the instructions in the tutorial under “prepare your model” to get the hugging face token. Once your secret is created, use my modified Deployment to get the correct storage configuration.

